Showing posts with label CD Weaving. Show all posts

Wednesday, October 23, 2013

Update on The Weaving Project


We continue to get lots of positive feedback on our installation at the Bellevue Arts Museum.

This is our wall of 500, made by students at Alcott, Dickinson, Rosa Parks, Explorer, and Redmond High School, along with friends and family too.


This smaller piece of 64 weavings are the some of the ones I made...


And these are some of the HUNDREDS made by visitors to the museum.  Visitors are invited to make one and add it to the installation, but most artists wanted to take their treasures home with them. This wall now has over 300, so it's getting to be almost as large as our installation of 500 on the adjacent wall.


The Weaving Project is on display until December 1st, FEBRUARY 2nd!!!! so you still have time to make a CD weaving to add to the piece.

It's been gratifying to hear from people around the world who are making CD weavings! It enlarges the idea of community that I hoped the project would express. Thank you to those of you who have taken time to let me know- I've heard from or seen the work of students, teachers, and individuals in Israel, Colombia, Australia, and many states in the United States. Wouldn't it be awesome to see them all together?

We are looking for another display opportunity once the show closes at BAM, so let me know if you have any ideas.


Make it a Wonderful Day!


Thursday, June 20, 2013

The Weaving Project

Unity/Variety: The Weaving Project 
Bellevue Arts Museum 
Bellevue, Washington
June 29-September 22, 2013
UPDATE: Extended until December 1st

WOW!!! Extended again until February 2nd!!

 
It's coming together. 


Almost 700 CDs. Each a unique weaving by kids, family, and friends.

 I submitted a proposal for an installation to the Bellevue Arts Museum, and they said yes. Originally, I said we'd make 300. But we made more! My Art Club students, classrooms at my schools, high school students, and even a few members of my quilt group have made a weaving to add to the piece. The kids are so excited to have their work hanging in a museum, and so am I.

 I laid them out on the floor at the Happy Valley Grange, and then used clear twist ties to attach them in columns.

 They will be hung on the wall. On another wall, there will be about 70 more hung as a starter piece, where visitors to the museum can make a weaving to add to the installation. I'll be teaching a couple of workshops, and kids who come to the Kid's Fair in late July will make them too. (LOTS of kids! LOTS of WEAVING!)

About the piece:
Unity and Variety are two principles of composition in art, and they are two driving principles of community as well. The weavings are as individual as the people who made them, beautiful and unique. And I see their beauty increased when they are joined in the larger piece, part of the larger community. We may only see the colors and textures of the weavings, but the CDs contain data and information, much like the hidden, inner story of the individuals around us.


The CDs and yarn are thrifted materials (Value Village, others) that found new, upcycled life in our artwork.


I'll also have a smaller piece of 64 weavings that I made: "I Contain Multitudes".  My title is based on a quote from Walt Whitman: "Do I contradict myself? Very well, then I contradict myself. I am large. I contain multitudes."


If you're in Bellevue, come see our work. Add your weaving too.


Monday, November 7, 2011

CD Weaving Tutorial

Finally! I've been trying to do a video tutorial on how to weave on a CD, but I've had technical problems. So photos will just have to do!
Thank you to everyone who has expressed interest in my weaving idea, and I'm so happy to hear some of you have already made these with your kids or students. Let me know if you have any questions, and I'll really try to get back to you!

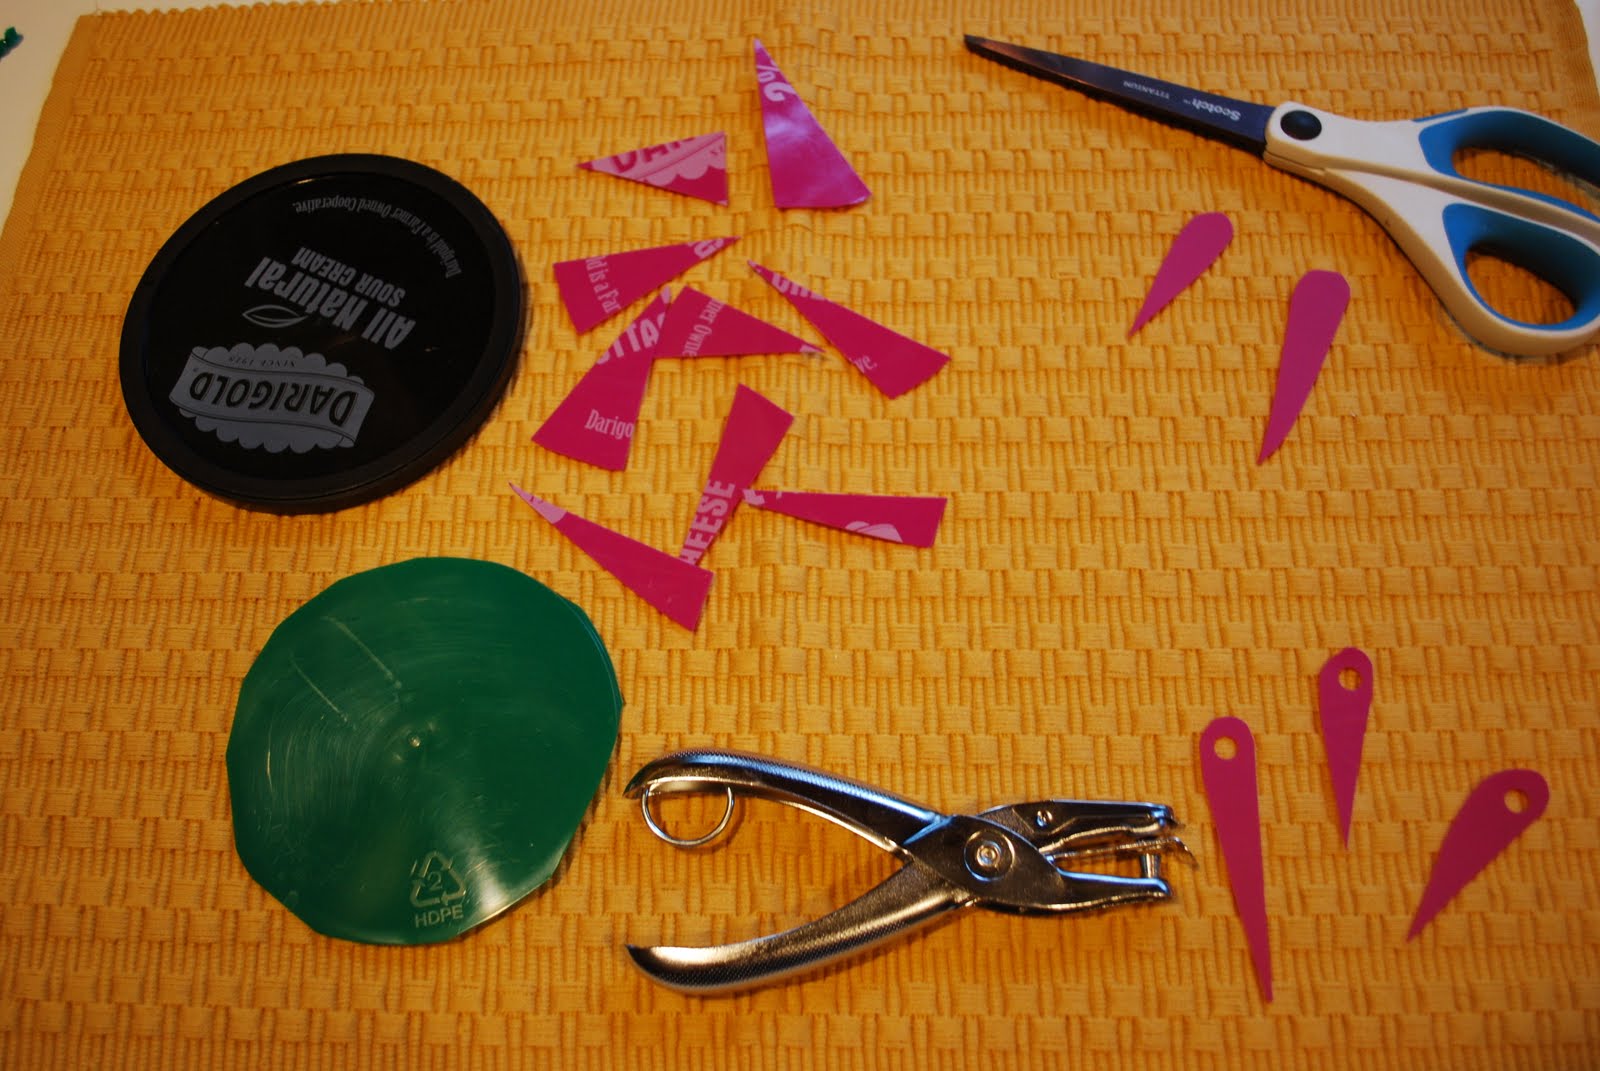
Here's what you'll need:(Old CDs, scrap yarn, scissors, and if you want to make the flexible needles, plastic lids, and a hole punch.)

To make the needles, cut the rim off the lid. Cut the remaining flat circle of plastic into pie shaped pieces, then round the top edge. Punch a hole in the rounded end to make the eye of the needle. Trim if needed. (You can use regular yarn needles, but I really like the flexible needle better- it's easy for the kids to thread, and I could have lots of them available at no cost. Some weavers preferred to not use a needle at all.) Update: I  rounded the pointed end so it would be less likely to split the yarn.
For this tutorial I've covered the CD with paper. (Just to avoid the reflection problem in the photos.)

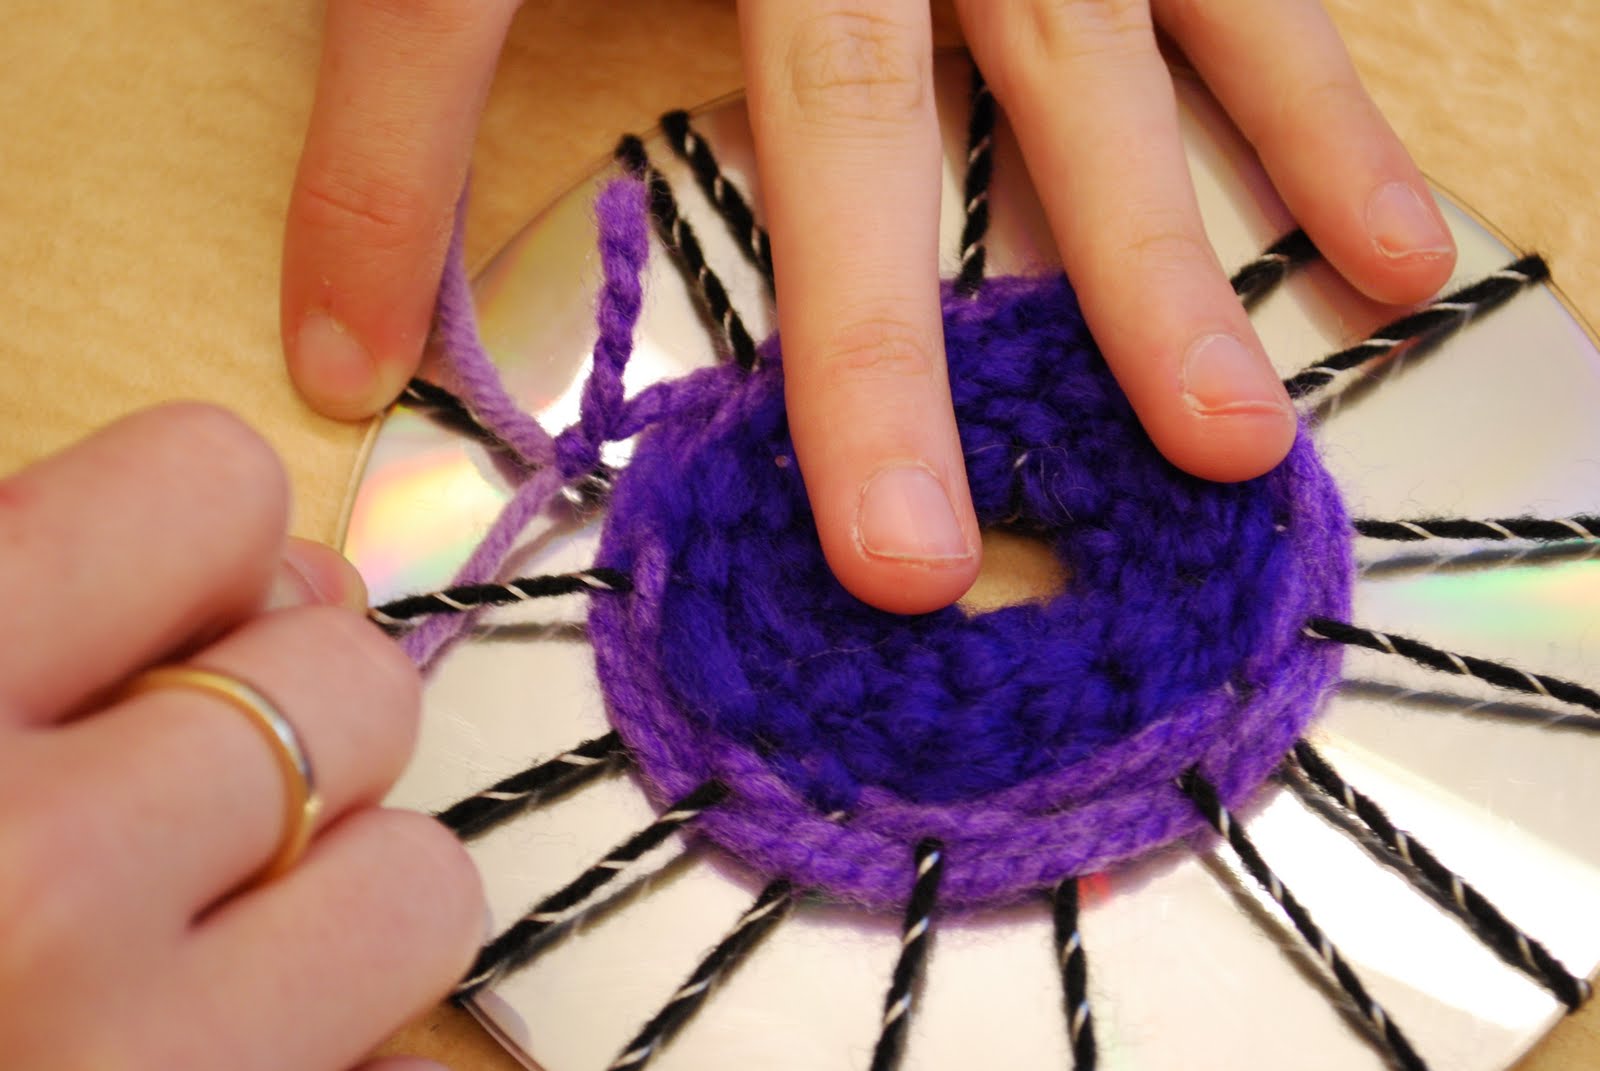
To Warp the CD: A smooth yarn works best, and I used a thicker yarn for younger weavers. The warp yarn is between 4 and 6 feet long. Tie it to the CD by putting one end through the center hole and knotting it to itself on the back. Turn the CD over to the front, pulling the thread through the center and wrapping around the CD, creating the spokes. update: Make sure the warp threads are pretty tight!)

(You can prepare the CD looms in advance if you like. I had most of my classes make their own, but it does cut into weaving time. I had to teach many of them how to tie a knot.
But I did love having the kids know how to do the project from start to finish, and then many of them were able to make lots more of these at home!)

It's IMPORTANT to have the warp threads be an UNEVEN number. It's easy to check this by pushing the spokes together in pairs, making sure your last one is a SINGLE...


The total number of warp threads can vary, as long as it's an uneven number. The fewer spokes, the faster it is to weave, but the looser the weaving will be, especially out near the edge. (I think it works well to have 13 or 15 for the younger kids, but some of my older students used a finer yarn or string and had as many as 25 or 27 warp threads. )


To keep the warp threads an uneven number without counting: As you put the threads on, keep them in pairs. Then add one more as a single. Knot the last thread on the back of the CD by tying it to the first thread. Then spread out the warp threads evenly on the front.
Now you're ready to weave!


Choose your first yarn. It will be the center of your weaving. Attach it on the back of the CD by tying it to one of the warp spokes.


Knot the other end to the needle. Push the needle up through the center hole to the front side. Weave over under, over under. When you get near the end of your yarn, attach another yarn. I taught the kids how to tie a square knot. (I spent a lot of time helping kids get the knot tying thing figured out!!)

I hold the CD in my hand as I weave, weaving in a counter clock-wise direction. (I'm right-handed...) I push the needle under a warp spoke and then off the edge, repeating over/under for a few spokes before before pulling the yarn all the way through and then down and tight.

When you add a new yarn, leave the tail long enough to tuck in after you've done a few more stitches so you can see where the knot needs to tuck in. If the tails are too short, they are harder to tuck in.


You can use a variety of yarns, including textured and fluffy yarns. But they are more challenging to work with. I encouraged younger weaver to use smoother yarns, at least until the got the hang of it. When you get to the last round, end by tying the yarn to one of the warp spokes and tucking in the end.

I loved having a huge variety for them to choose from! I purchased many of the yarns from a thrift store (Value Village).


So there you have it- I hope that helps! Thanks to all of you who have expressed interest, and I would LOVE to see the work of your talented weavers!


Make it a Wonderful Day!

Thursday, June 9, 2011

More CD Weaving...

UPDATE: Go HERE for my CD Weaving Tutorial
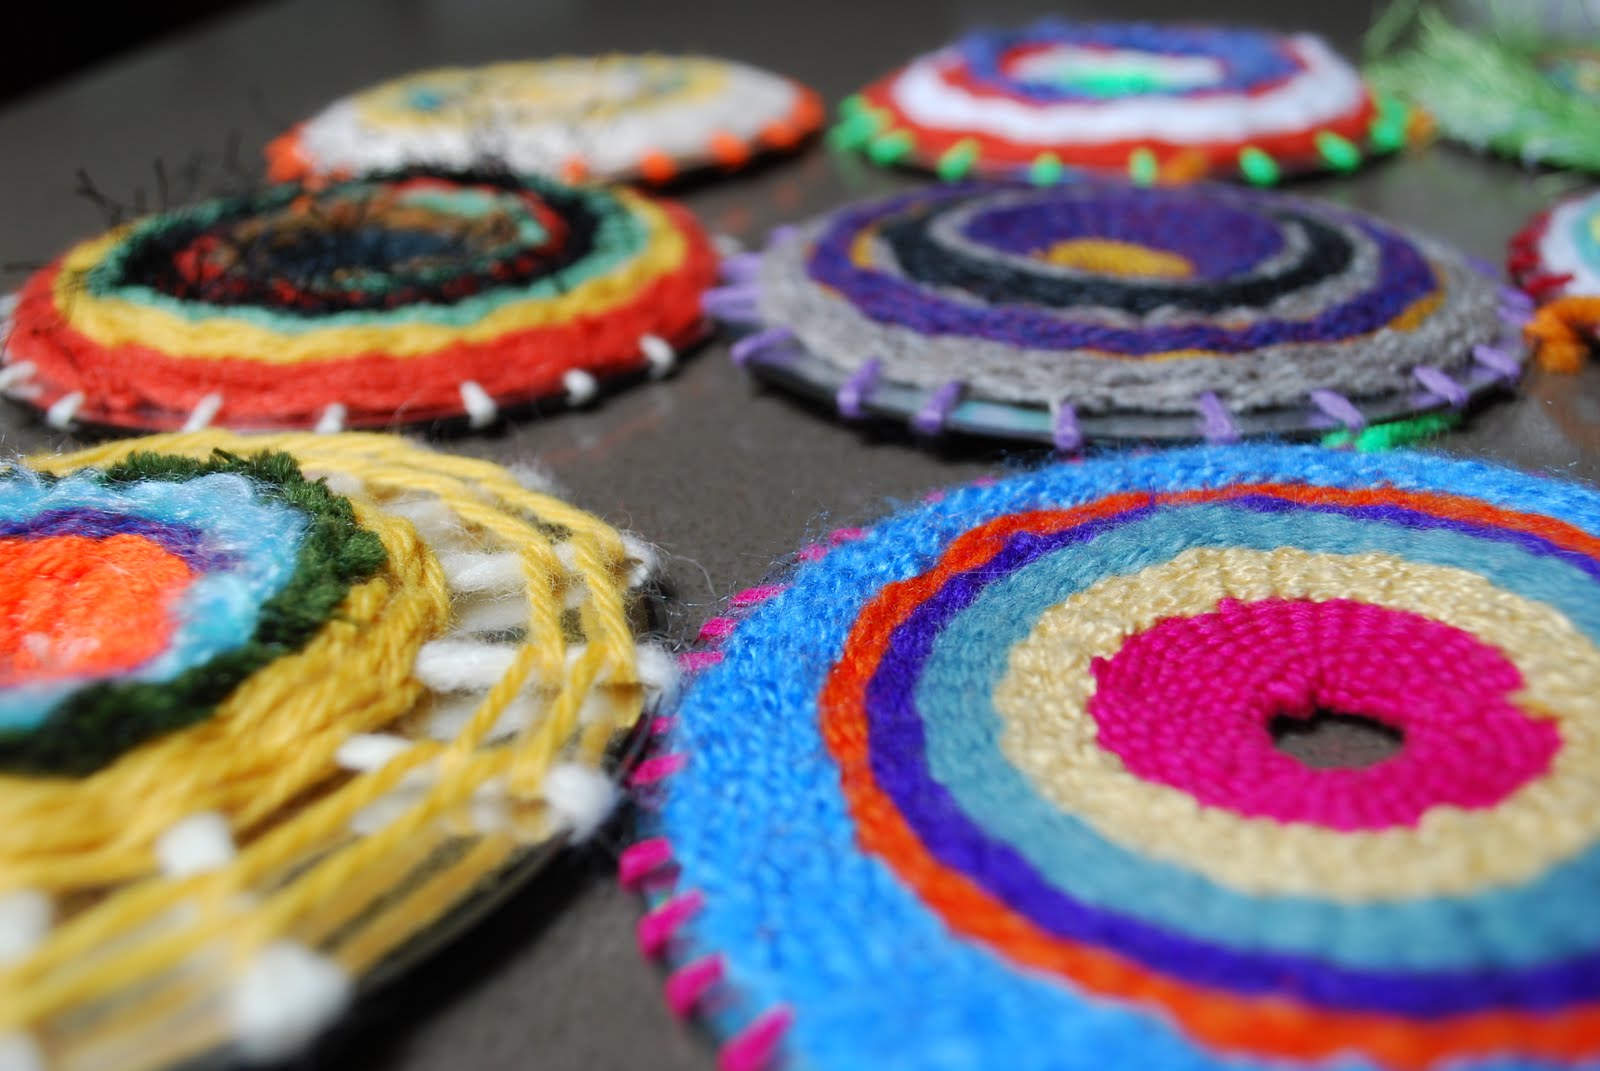
Here are the CD weavings my students made. I love the variety!
Each student made at least one. As with every artist and every project, some worked more quickly than others. I cut out "needles" from plastic lids, then used a paper punch to make the "eye". The flexible needles were easy to use, and the large eye made threading easy enough even for my youngest students.


The artists changed yarns as frequently as they wished, but I encouraged them to finish the yarn on their needle just to avoid wasting it. The knot was tucked in under the weaving.


I attached the disks to each other in columns with twist ties. The top disk has a twist tie loop so the column can be push pinned to the wall.


The sign for one of my schools is made from a cake cardboard I happened to have on hand...


You can see how some of these are really dimensional. The thicker the yarn and the tighter the weaving is pulled, the puffier the piece.


Make it a Wonderful Day!

Tuesday, June 7, 2011

CD Weaving

UPDATE: Go HERE for my CD Weaving Tutorial
I think I'm addicted. Making these has been so much fun!

I've been weaving on CDs. I wanted to come up with a weaving project for my Art Club classes that we could do in a shorter time than when we've built looms.

Weaving with beads and wire was awesome...but after making this one, I decided it wasn't going to work with my Art Club kids. Wire can be a bit difficult for kids to manage.


But yarn was wonderful! I have a bin of yarn, most of it thrifted (Value Village), so we had the variety that made this so fun.


The CDs are ones I'd collected from kids a couple of years ago. When I asked for old CDs for a collage project, the kids brought in STACKS of them! So this was a good project using supplies I already had on hand.


These are the ones I made- I really had so much fun making them, and I kept wanting to try different yarn combinations. I'll post the AWESOME ones the kids made later this week.

Make it a Wonderful Day!